
Pruning cuts
There are three types of pruning cuts. Each is distinctly different and is used to accomplish unique objectives. Using only the three cut type names, reduction, removal, and heading, makes communication simpler.

Go back: Evaluating a tree

Reduction cut
Remove a branch to a node with a smaller branch

Removal cut
Remove a branch from a trunk or parent branch
Next Page: Structural Pruning
Heading cut
Remove a branch between lateral branches

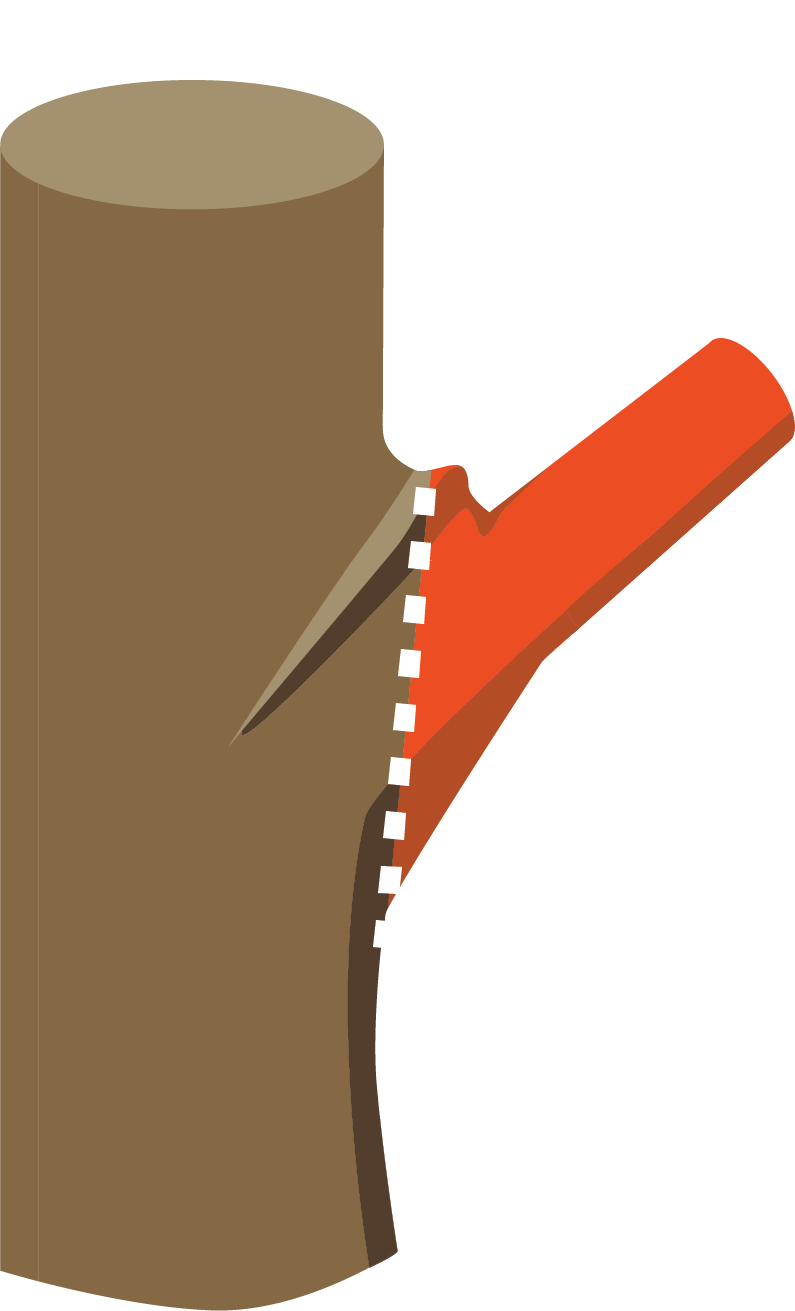
Reduction Cut

A reduction cut reduces the length of a stem or branch by removing the terminal portion back to a living lateral branch of equal or smaller diameter. The cut should be made just beyond a lateral branch that is large enough to prevent excessive death of sapwood, decay, or visible bark death. This size varies with species, but should be no less than one-third the diameter of the cut stem; the preferred minimum is one-half the diameter.
Traditionally the cut was executed by bissecting the angle between the branch bark ridge and an imaginary line perpendicular to the stem to be removed. However, recent research found decay was less when wound diameter was small (Dujesiefken 2002; Gilman and Grabosky 2007), suggesting a cut that makes a smaller wound.
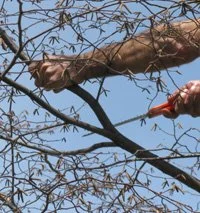
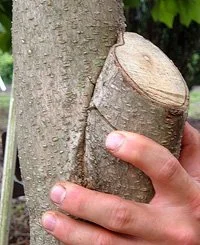
Do not cut parallel to the branch bark ridge because this exposes too much wood surface area, results in more decay, and can create a weak point. The objective is to find a cut angle and position that minimizes surface area of the cut as well as bark and cambium dieback behind or under the pruning cut. This can depend on species, time of year, and factors we do not fully understand such as temperature and presence of decay-causing fungi. The arborist has just made a reduction cut on the elm shown to the right.
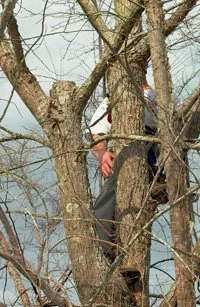
The arborist has just made a reduction cut on the elm
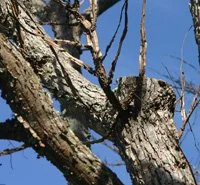
Sprouts emerging behind a reduction cut are not harmful and help close the cut wound
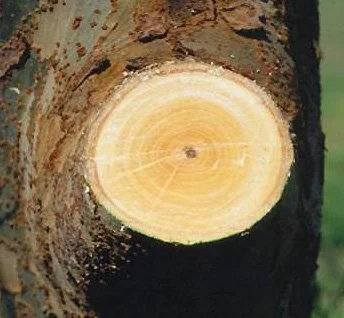
A reduction cut was made on the left stem
The branch is cut at angle to minimize wound diameter
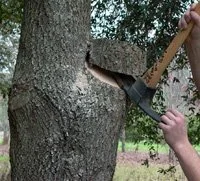
Pro Tip: Removing a branch with an inclusion
An inclusion is where bark is embedded in the union between a branch and the trunk or between two or more stems, preventing the formation of a normal branch bark ridge sheIf. To prune a branch which has an inclusion at the union, finish the cut with a handsaw to avoid damaging the remaining trunk.
1
Use a saw to cut and incision in the branch as far as possible. Use a sturdy tool to ‘pop’ the stub free
2
Clean-up with a chisel or small hand saw finishes the cut
3
Healing process over the course of six years.
Removal Cut

Evaluate which situation below matches your tree condition
Pruning cut made at a wide angle to the trunk based on collar and branch orientation
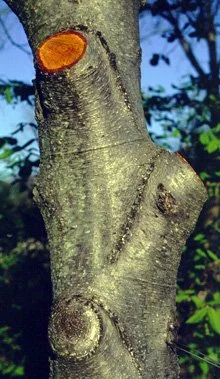
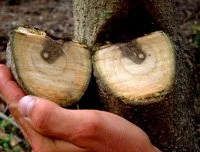
10 inch diameter branch removed from tree
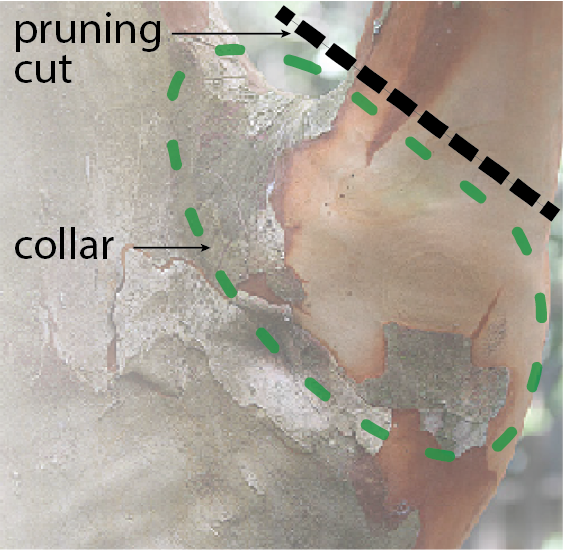
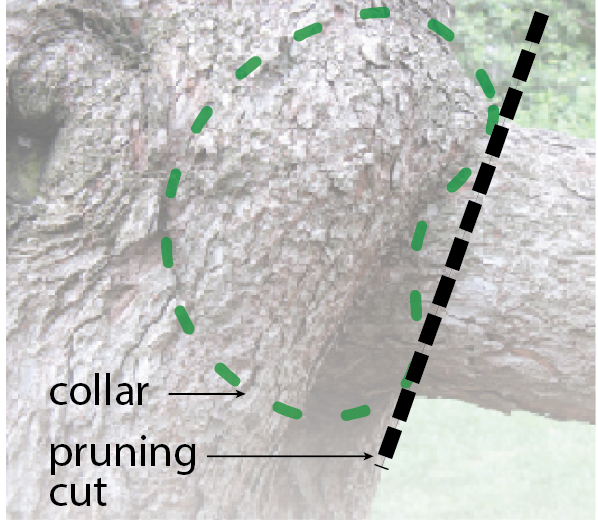
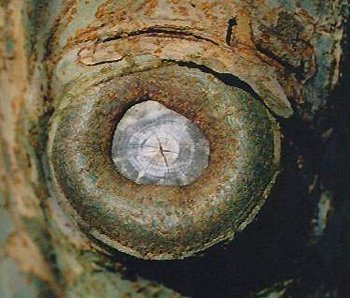
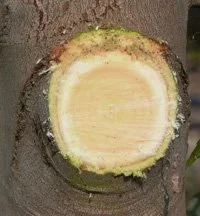
A removal cut removes a branch back to its parent stem or trunk and retains the collar. Collars at the base of branches become most prominent when the branch is much smaller than the trunk. In contrast to a reduction cut, the part of the plant that remains following a removal cut has a larger diameter than the part that was removed. Examples include removing a limb from the trunk, cutting a lateral branch from a limb, or cutting a smaller branch from a larger one.
There is no universal angle to the trunk or parent stem at which to make a proper cut. Instead, the angle is determined by collar location and shape, location of the branch bark ridge, the tree species, and your experience. Most cuts are made at an angle, moving downward and away from the trunk. Depending on the species, some will be made parallel with the trunk. Sometimes the cut should form a wide angle with the trunk. Occasionally, if the collar is more prominent on top, the bottom of the cut angles downward toward the trunk. This is most common when the branch to stem aspect ratio is small and the collar has grown far out on top of the branch base.
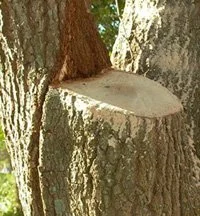
Case 1: the branch has a visible collar
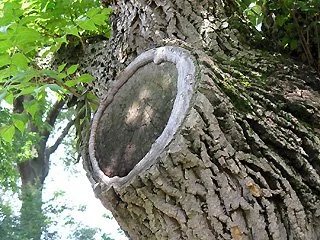
The pruning cut should cut close to but not bisect the collar. The goal of the cut is to produce a circular wound as in the right image.
Pruning cut made parallel to the trunk based on collar and branch orientation
Case 2: the branch has no visible collar
Make the cut perpendicular to the top of the branch.
top: round removal cut
bottom: round wood wound one year later
Case 3: the branch has inclusion
The pruning cut should be made just above the inclusion where the double ridge comes together.
There is some wood connecting the branch to the stem below the position of the forefinger. The pruning cut should be made just above this point, where the double ridge comes together.

The branch bark ridge and collars both remained in place following the removal cuts. The pruning cut at the bottom is completely closed over forming symmetrical woundwood.
The branch base falls away from the retained stem because there was no connection between branch and stem. The discolored wood resulted from the rubbing that occurred in the included union. Decay in the union often begins here with inclusions.
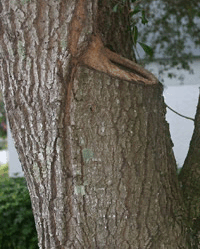
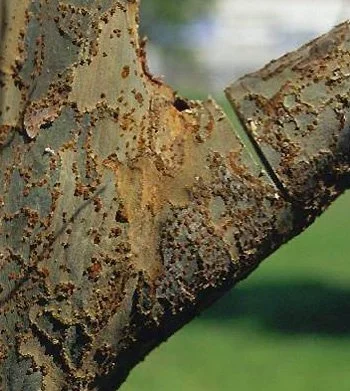
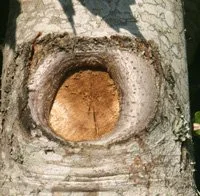
Case 4: removal cut of a large branch
Proceed as you would with a smaller branch. The final cut should be symmetrical.

Resulting round removal cut
Wound, 14 years later
Heading Cut
A heading cut reduces the length of a stem or branch back to a point without regard to the position or diameter of nearby lateral branches.
Heading cuts include:
1) Cutting a small twig or branch back to a dormant bud.
2) Cutting a larger stem back to a node without an existing lateral branch. A node signifies a dormant bud under the bark typically identified by a slight ridge ringing the stem on smooth barked trees. These can be difficult to see on large branches and on trees with deep bark fissures.
3) Cutting a stem back to a lateral branch that is less than about one-third the diameter of the cut.
A heading cut is made perpendicular to (across) the long axis of a stem, or at a slight angle downward away from the retained bud. The term heading has also been used to describe pinching, shearing, tipping, rounding-over, and topping.
Cutting between nodes (an internodal cut) is less desirable because sprouts may emerge from buds some distance behind the cut surface, leaving a dead stub. However, even proper heading cuts back to buds or nodes can result in dead stubs when the nearby buds fail to sprout.
Go back: Evaluate a tree
What NOT to do // Shear cut
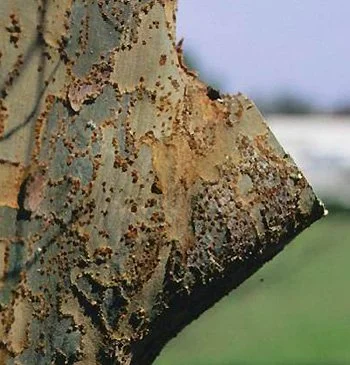
For many years the standard pruning practice was to remove the swollen branch base along with the branch, making the final cut flush, or even, with the bark of the trunk or main branch. Exposed bark on the upper surface of a flush cut appears thicker than bark to the sides and lower surface of the cut because a flush cut severs trunk wood above the cut; sometimes, trunk tissue is removed on the sides and bottom of the cut. In contrast, bark is the same thickness all around a properly made removal cut.
Flush cuts tend to be oval in cross section; whereas, collar cuts (at least on most small-diameter branches) are close to circular. Collar cuts can be oval on some branches. Flush cuts, and the woundwood that closesover the cut, tend to be oval in cross section; whereas, woundwood on collar cuts closes in a more-or-less circular fashion. There are exceptions to this on certain trees that present an oval cross section at the branch base. A flush cut should not be used on tree planted in urban landscapes.
As shown to the left, the cut may bisect the branch collar, which can be very damaging to some tree species.
Flush cut often leaves the bark wider on top of the cut surface than on the sides and bottom
Woundwood is forming faster on the sides of the pruning wound than the top and bottom.
Next page: Structural pruning